theFASHIONtamer Where Style Meets Space, Effortlessly
 Are you ready to breathe new life into your teen’s room? Transforming a space into a stylish sanctuary doesn’t have to be a daunting task or a budget-busting endeavor.In this listicle,we’ve curated 27 creative DIY ideas that will inspire you and your teen to embark on a fun and fulfilling redecorating journey. From clever organization hacks to artistic decor projects, each idea is designed to not only enhance the aesthetics of the room but also reflect your teen’s unique personality and interests. Whether you’re working with a small budget or seeking to repurpose items you already have, thes DIY initiatives will empower you to create a cozy haven where comfort meets style. Get ready to unlock the potential of your teen’s space and discover how small changes can lead to a big impact!
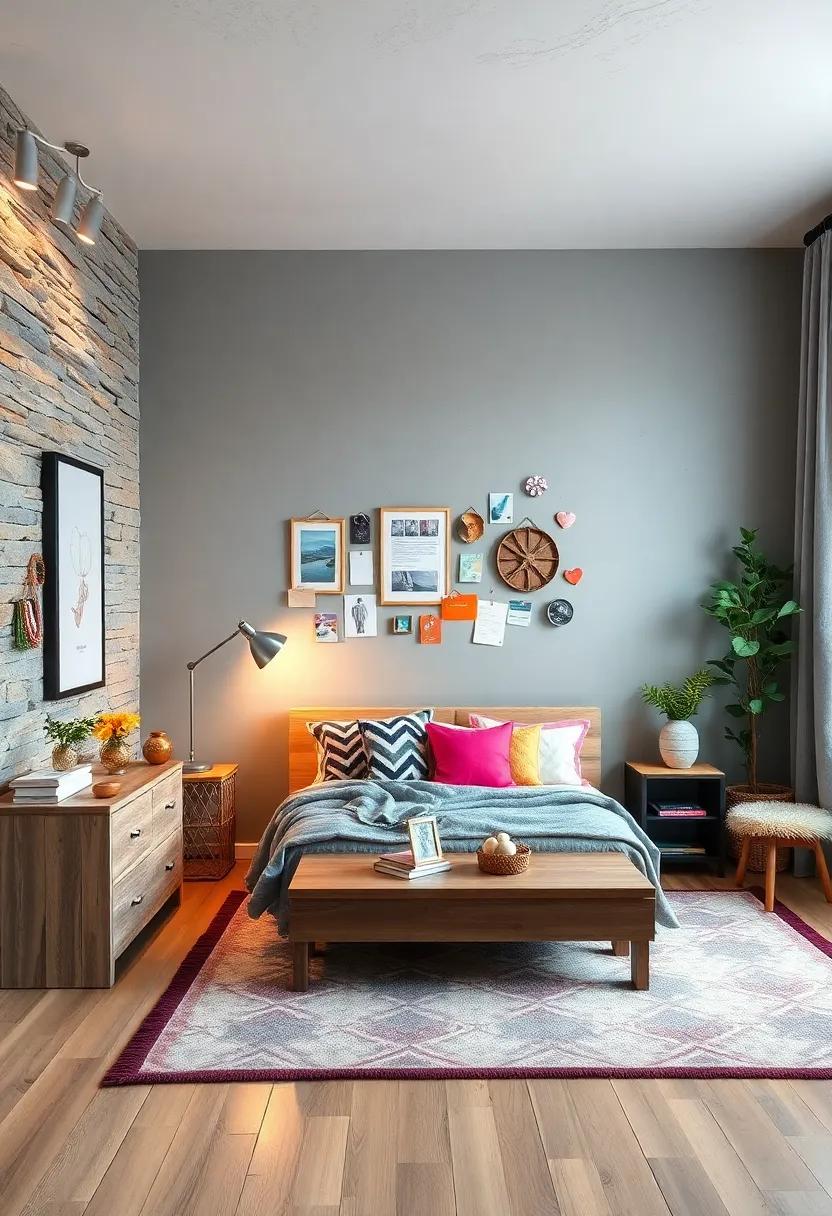
Create a Gallery Wall: Showcase your personality by mixing framed art, photos, and inspirational quotes for a unique visual experience

Transform a blank wall into a vibrant display of your personality by creating a captivating gallery wall.Start by selecting a color palette that resonates with your style; consider colors that complement your room’s theme. Mix and match framed art, family photos, and inspiring quotes—each piece should reflect who you are. Use a combination of shapes and sizes for the frames to add depth and visual interest. Arrange them on the floor first to experiment with composition before hanging them on the wall.
For the ultimate experience, think beyond typical art and photographs. Incorporate textural elements such as fabric swatches, pressed flowers, or even small mirrors to create layers. You can also designate specific sections for different themes, like a love for travel or favorite hobbies.Since this is your sanctuary, let your creativity shine—experiment with unconventional items like a playful wall clock or your favorite album covers. Don’t forget to leave some space for future additions; a gallery wall is a living entity that evolves as your tastes do!
Upcycle Old Furniture: Give new life to a tired desk or chair with fresh paint, new upholstery, or creative stenciling

Transforming old furniture can breathe new life into your teen room, making it feel as fresh as it does functional.For that tired desk that’s seen better days, start by selecting a bold, vibrant color for a complete makeover.One coat of paint can turn a mundane workspace into a vibrant creative hub. To take it a step further, consider applying gold or silver leaf accents on the edges for a luxurious touch. Pair this with a whimsical stencil design to personalize the piece; think geometric patterns or favorite quotes that inspire productivity.
Don’t overlook those worn-out chairs; they can easily be revitalized with new upholstery. Choose a fabric that complements your room’s color scheme – perhaps a soft velvet for a touch of elegance or a funky patterned fabric for a pop of fun. To enhance comfort, add a cushioned seat while you’re at it. upcycling doesn’t stop there; consider mixing textures, like combining wood with metal or fabric accents, for a uniquely styled look that reflects your personality. With a little creativity and elbow grease, these old furniture pieces can become not just functional but also statements of style in your sanctuary.
DIY String Lights: Add a warm glow to your room by hanging string lights with clips for photos or paper stars

Transform your room into a cozy haven by incorporating charming string lights that double as a canvas for your favorite memories. Hang them up against a wall or across a ceiling to create an inviting atmosphere. Use small clips to attach photos of friends, family, or favorite quotes that inspire you. Not only does this provide a personal touch, but it also adds an artistic flair.You can even suspend paper stars alongside your pictures for a whimsical night-sky effect that brings magic to your space.
For an added design twist, consider creating a photo wall or a starry corner using varying lengths of string lights. Arrange them in playful patterns, such as zigzags or spirals, to enhance the visual intrigue. Choose from a variety of light styles—like warm white for a classic glow or colorful options for a fun pop. To keep things organized and aesthetically pleasing, you can also use a simple table organizer on your desk to hold spare clips and fairy lights, ensuring your creative corner remains tidy and functional.
Custom Bed Canopy: Transform your sleeping space with a whimsical canopy made from sheer fabric or curtains for a cozy retreat

Imagine stepping into your teen room and being enveloped by an enchanting canopy that transforms the ordinary into the exceptional. A custom bed canopy made from sheer fabric or delicate curtains can create a cozy retreat right above your bed. Choose fabrics that resonate with your personal style—think soft pastels, vibrant prints, or subtle neutrals—to intertwine into your theme. Suspend light, airy panels from the ceiling or a simple curtain rod for a dreamy touch. the way the light filters through the fabric can create shadows that dance across the room, adding an effortless charm that makes your sleeping space feel like a cozy hideaway.
Enhance the magic by accessorizing your canopy with a few thoughtful touches. String lights can be woven through the fabric, creating a soft glow that becomes your evening companion for reading or relaxing. Consider adding a few decorative elements such as tassels, pom-poms, or fabric flowers for added texture and whimsy. You can even create a bespoke look by layering different fabrics or varying lengths of curtain panels. Below is a quick guide to help you choose the perfect canopy style that suits your bed and aesthetic:
| Canopy style | Fabric Type | Suggested Color Palette |
|---|---|---|
| Bohemian | Muslin | Earth Tones |
| Modern Minimalist | Sheer voile | White & Gray |
| Classic Elegance | Velvet | Deep Jewel Tones |
| Whimsical | Printed Cotton | Pastels & Brights |
| Romantic | lace | Soft Pink & Cream |
Colorful Throw Pillows: Sew or decorate your own cushions with fun fabrics to add comfort and personality to your bed or seating area
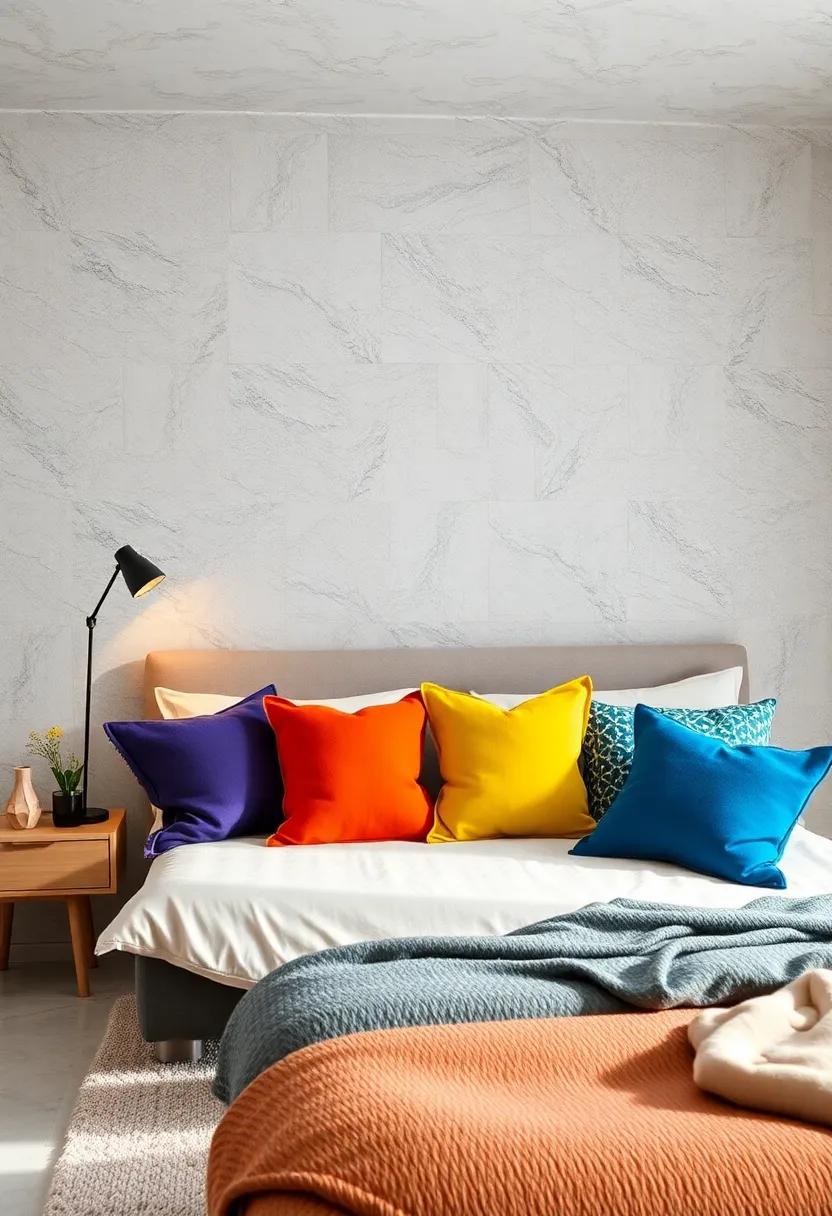
Transforming your space with colorful throw pillows is an engaging DIY project that can bring both comfort and character to your teen room. with a variety of vibrant fabrics at your fingertips, you can sew or decorate cushions that reflect your unique style. Consider choosing materials that feature fun patterns, like bold geometrics, whimsical florals, or even funky animal prints. Don’t shy away from experimenting—mixing and matching different textures and colors can create a striking effect that ties your room together. You can even customize pillow shapes, opting for the classic square or exploring round and bolster options for a dynamic visual.
once you’ve selected your fabrics, consider personalizing each cushion with a few extra embellishments. Techniques such as fabric painting, iron-on patches, or appliqué designs can add an extra layer of creativity. Here are some ideas to further enhance your throw pillows:
- Stenciled Quotes: Use fabric-safe paints to add inspiring words or phrases that resonate with you.
- Pom-Pom Edging: Stitching pom-pom trim around your pillows offers a playful touch.
- layering: Combine small and large cushions to create a cozy and inviting seating area.
- Seasonal Themes: Rotate your pillow covers with the seasons to keep the atmosphere fresh and lively.
Magnetic wall: Paint a section of your wall with magnetic paint to create a fun spot for displaying notes, art, and photos
Transform a dull section of your wall into a dynamic, interactive space with magnetic paint.This unique idea not only allows for easy display but also adds a splash of creativity to your teen’s sanctuary. Imagine having a designated area where they can showcase artwork, photos, and inspirational quotes. The beauty of magnetic paint lies in its versatility; it can be painted over with any color to match your room’s theme while still maintaining its hidden magnetic properties. Create a functional and aesthetically pleasing corner where imagination meets organization!
Once your magnetic wall is up, the possibilities are endless. Utilize magnetic frames for quick art changes, or encourage experimentation with magnetic poetry tiles. You can also incorporate magnetic hooks to hang lightweight items like headphones or keys, making it a multi-functional space.Consider organizing a rotating gallery featuring family photos, recent art projects, or meaningful mementos—just take them down and swap them out as moods or occasions change. With a bit of creativity and a splash of paint, this wall will become a constant source of inspiration and a personal touch in the ever-evolving world of your teen.
Floating Shelves: Install floating shelves to display books, plants, or treasured items, adding both style and storage to your room

Transforming any wall into a stunning focal point is effortless with the addition of floating shelves. These sleek installations not only serve as practical storage solutions but also provide a canvas for your personality to shine through. Whether you prefer to showcase a curated collection of books, display your beloved plants, or highlight treasured keepsakes, floating shelves can elevate the aesthetic of your room. Choose a color or finish that complements your decor; natural wood tones warm up spaces, while bold painted options create a striking contrast.
To enhance your design, consider integrating lighting beneath or above your floating shelves. LED strip lights can add a modern touch and illuminate your displays, making them pop even more. Mix and match shelf sizes and arrangements to create visual interest,using geometric patterns or staggered layouts for added flair. For a cohesive look, think about using decorative baskets or matching displays for your items, like:
| Item Type | Display Idea |
|---|---|
| Books | Arrange by color for a rainbow effect |
| Plants | Vary heights using plant stands or pots |
| Photos | Mix frames for a gallery wall vibe |
DIY Soft Headboard: Craft a padded headboard using foam and fabric to create a chic focal point for your bed without breaking the bank

Transform your bedroom into a stylish sanctuary with a personalized padded headboard that adds both comfort and elegance. Start by gathering your materials: high-density foam, fabric of your choice, a wooden board for the base, and a staple gun. Choose a fabric that complements your room’s color scheme, whether it’s a bold print or a soft, neutral tone. Cut the foam to the desired shape and size, then adhere it to the wooden board using glue for extra stability. By custom-cutting your foam, you can create unique shapes that reflect your personality, ensuring your headboard becomes a true statement piece.
Once the foam is secured, lay your chosen fabric over the foam, allowing for some extra material for folding and stapling at the back. Wrap the fabric around the edges and use a staple gun to secure it tightly, ensuring a smooth and polished finish. To add an extra touch of glamour, consider adding decorative nailheads or trim along the edges. You can easily hang your new headboard on the wall using brackets or lean it against the wall for a more relaxed look. This DIY project not only enhances the aesthetics of your room but also allows you to express your style without spending a fortune!
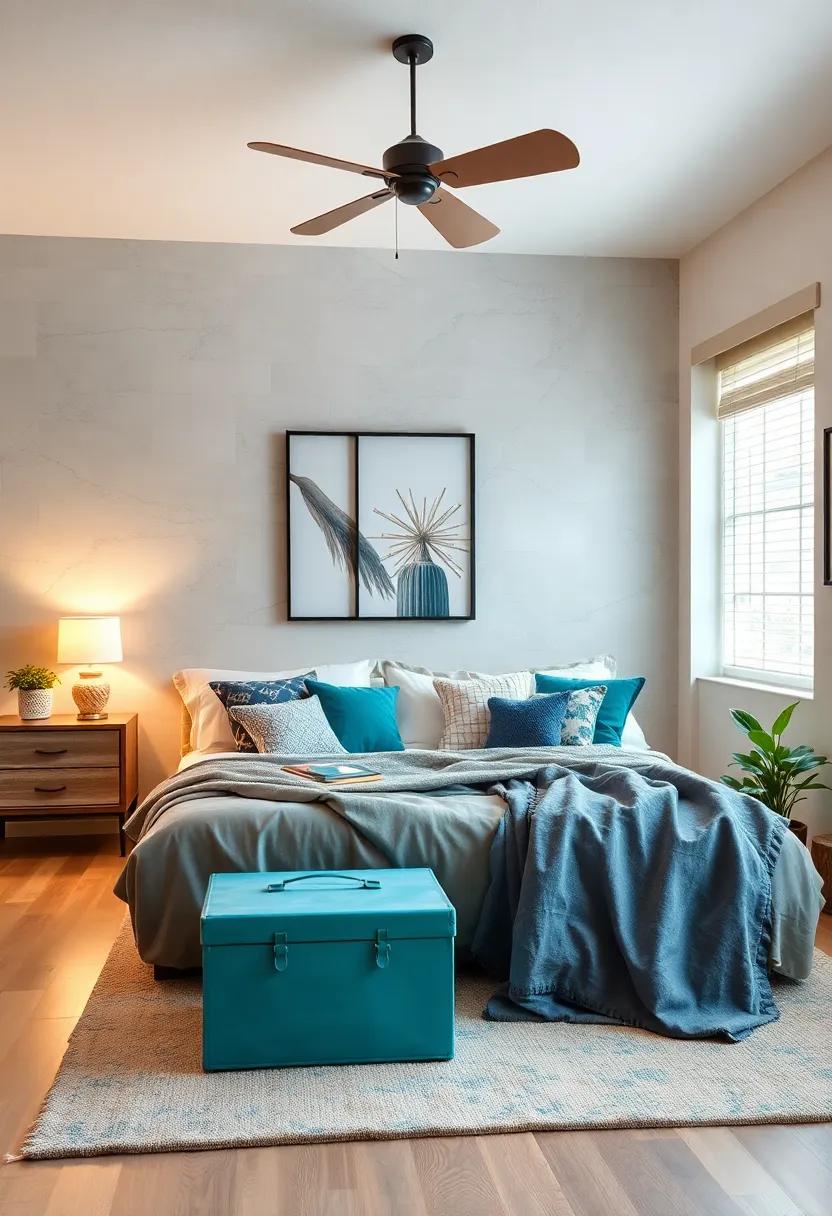
Vintage Suitcase storage: Repurpose old suitcases as bedside tables or storage solutions, adding a touch of nostalgia and style
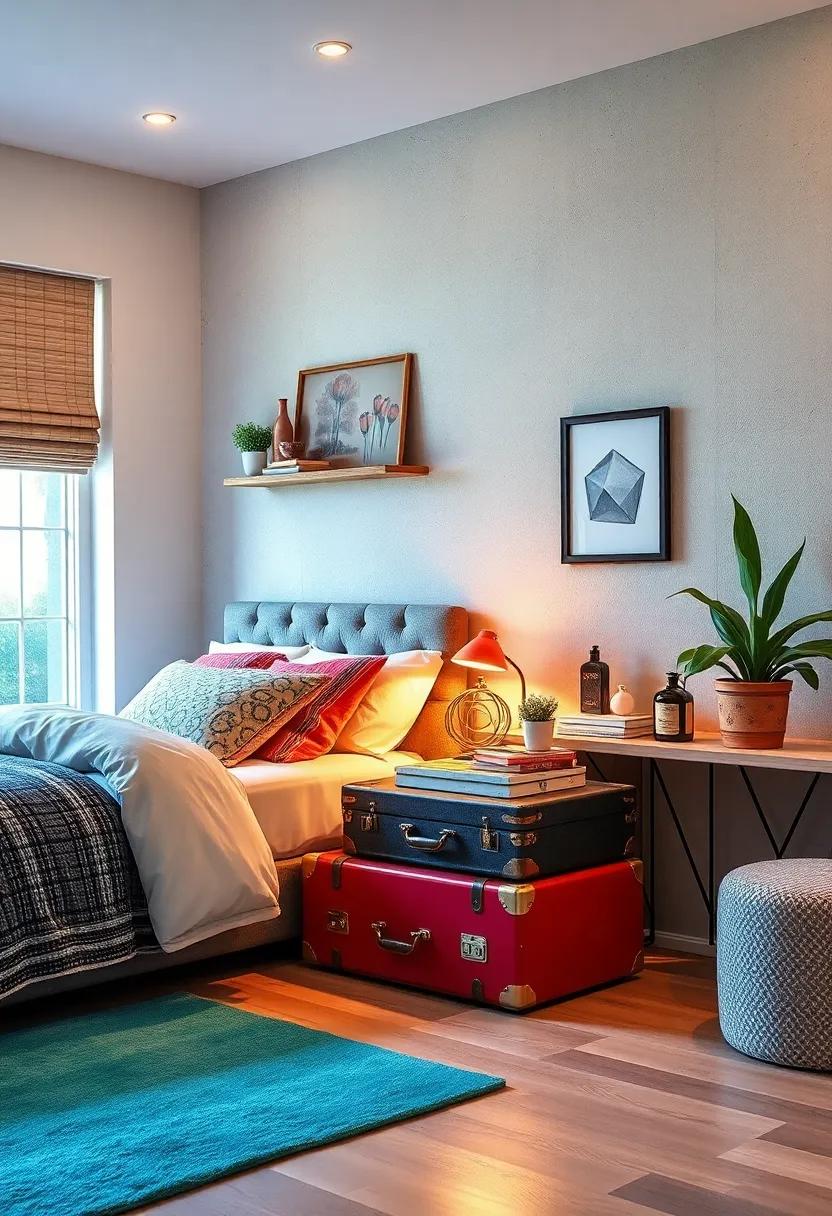
If you’re on a mission to enhance your teen room while embracing a sense of nostalgia, old suitcases can provide the perfect solution.These charming relics can be transformed into unique bedside tables that blend functionality with style. Stack a couple of different-sized suitcases to create a minimalist-black-living-room-design/” title=”Embracing …: The Allure of a … Black Living … …”>minimalist side table, perfect for holding a bedside lamp and your favorite reads. Choose suitcases that reflect your personality—whether it’s a classic leather piece, a colorful patterned one, or even a vintage hard-shell case, each will add a flavorful pop to your decor.
Additionally, consider using these suitcases as creative storage solutions throughout your room. Here are some creative ideas for repurposing your vintage finds:
- Under-bed storage: Slide a suitcase under your bed to keep seasonal clothing or extra blankets organized.
- Creative display: open a suitcase and use it to showcase your favorite collections, like sneakers or vinyl records, creating a focal point in your room.
- Workspace addition: Use a suitcase as a quirky desk for a small workspace, adding character without taking up too much room.
Painted Floor: transform your room’s vibe with a bold paint job on the floor, creating an eye-catching foundation for your décor
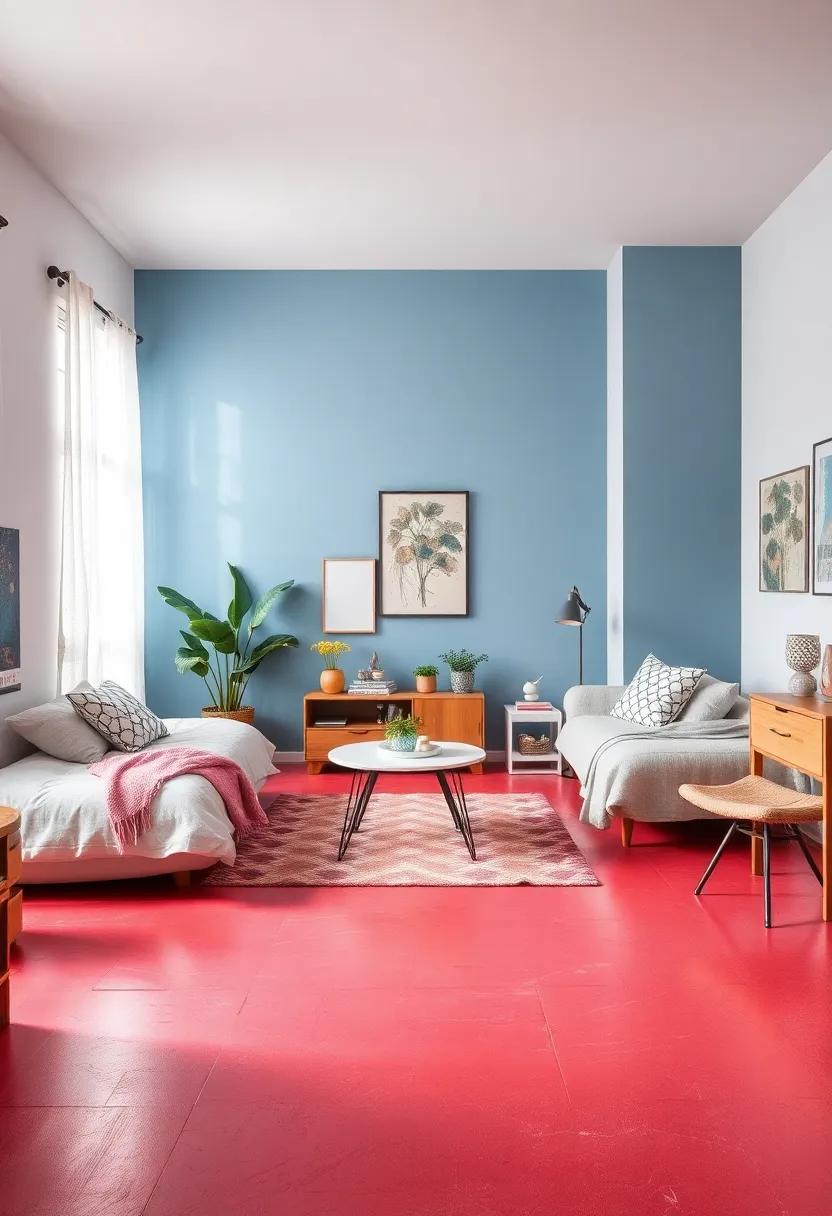
One of the most impactful ways to revitalize your teen’s room is by painting the floor. This bold choice sets the stage for creativity and can dramatically alter the overall atmosphere of the space. Consider options like a geometric pattern, which can add dimension and interest, or a solid color that complements the existing decor. For a truly unique twist, try using a ombre effect that flows from one color to another, creating a stunning visual experience that draws the eye. the floor becomes not just a surface to walk on, but a fundamental piece of art that invites exploration.
When planning your painted floor project,think about how the color and design will play off other elements in the room. You might consider pairing a vibrant, high-contrast paint job with neutral furnishings to maintain balance, or integrating accent colors from the walls or accessories to create harmony. Here are some ideas to spark inspiration:
- Luminous and Cheerful: A sunny yellow or vibrant teal can energize the space.
- Subtle Elegance: Soft pastels or muted tones create a calming environment.
- Nature’s Touch: Earthy greens and browns can foster a sense of tranquility.
Wall Mural: Showcase your artistic side by painting a large mural or opting for a removable wall decal that reflects your interests
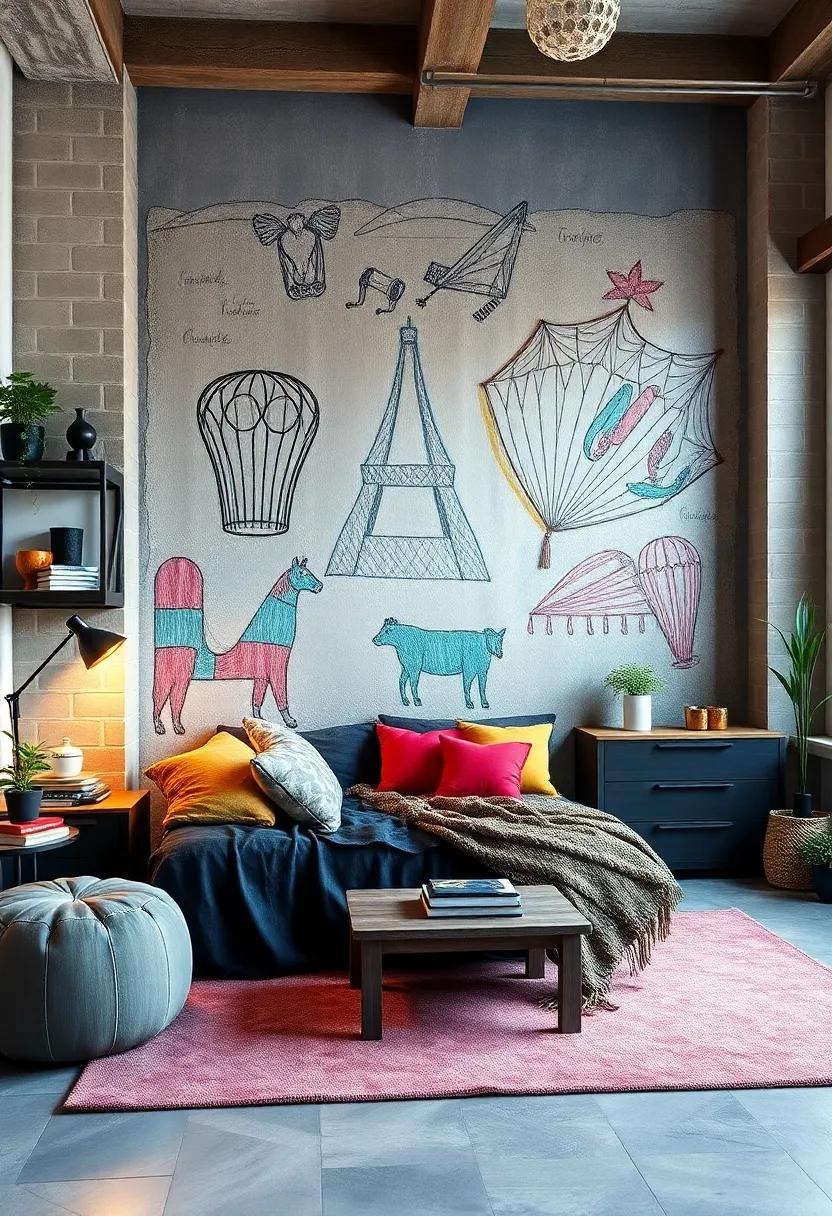
Unleash your imagination by transforming an empty wall into a canvas that speaks to your personality. Painting a mural allows you to create a stunning focal point that can reflect your interests, hobbies, and aspirations. Whether you choose an intricate city skyline, a serene nature scene, or an abstract design bursting with color, a mural can set the mood for your entire room. For those who may want something less permanent, removable wall decals offer a fantastic choice. These decals are available in various themes, from inspirational quotes to your favorite pop culture icons, making it easy to change up your space as you evolve.
before diving in, consider sketching out your design or browsing through various styles to find the perfect fit. If you’re artistically inclined, grab your paintbrushes and let the creativity flow, or if you’re leaning towards decals, think about mixing and matching different sizes and shapes for added visual interest. To help you plan your mural or decal arrangement, here’s a simple table of popular themes you might explore:
| Theme | Description |
|---|---|
| Nature | Forests, mountains, and serene landscapes that bring a sense of calm. |
| Urban | Bold cityscapes that capture the energy of metropolitan life. |
| Abstract | Dynamic shapes and colors that add an edgy, modern twist. |
| quotes | Inspiring phrases to motivate and uplift you daily. |
| Pop Culture | Decals of your favorite movies, bands, or characters. |
Personalized Desk Organizer: Create a unique desk organizer using jars, boxes, or wood to keep your study space tidy and stylish
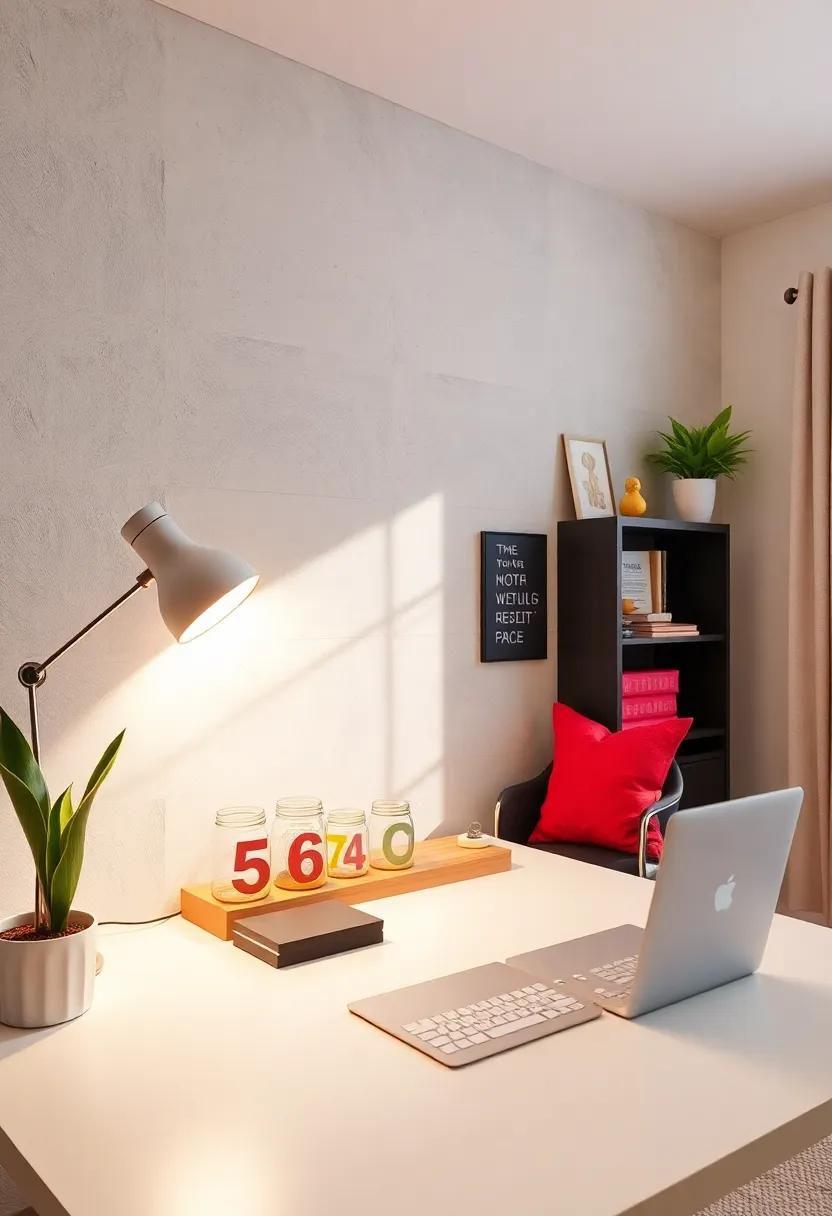
Personalized Desk Organizer
Transform your cluttered desk into a stylish haven of organization with a personalized touch! Begin by gathering items like glass jars, wooden boxes, or tin cans. Decorate them with paint, washi tape, or fabric to match your room’s aesthetic. Arrange them in a visually pleasing manner, grouping similar items together. As an example, use a painted jar for pens, a small wooden box for sticky notes, and a decorated tin can for scissors. This not only helps maintain a clean workspace but also elevates your room’s decor.
To add an extra layer of creativity, consider using a shadow box to house your desk organizers! Simply mount the box on the wall and fill it with your customized containers. This way, you can free up desk space while still keeping your essentials within arm’s reach. Incorporate labels made from cardstock or stickers to identify each container’s purpose. You can even personalize it further by adding decorative elements, such as photographs or quotes, creating a functional yet expressive organizational tool.
DIY Mood Board: Craft a corkboard or magnetic board to pin your dreams, goals, and inspirations, making it an evolving piece of art

Transform your dreams into a visual masterpiece with a DIY mood board! Start by gathering materials such as a corkboard or a magnetic board,which you can find at craft stores or make at home. Next, customize the board with a coat of paint or decorative paper to match your room’s theme. Use pins, magnets, or clips to attach items that inspire you—think magazine clippings, photographs, quotes, and colorful swatches.This living canvas will not only keep you motivated to achieve your goals but will also add a personal touch to your space.
As your aspirations evolve,so can your mood board! Regularly update it by swapping out old visuals for new ones,allowing it to reflect your journey and transformations. Consider incorporating elements that spark joy, like small trinkets from memorable outings or personal artwork. You can even create a small section for short-term goals and another for long-term dreams,distinguished by different colors or styles. With every new addition, you’re not just pinning items; you’re crafting a dynamic piece of art that breathes life into your sanctuary.
Indoor Plant corner: Designate a charming corner for indoor plants, using stylish pots to bring life and color into your space
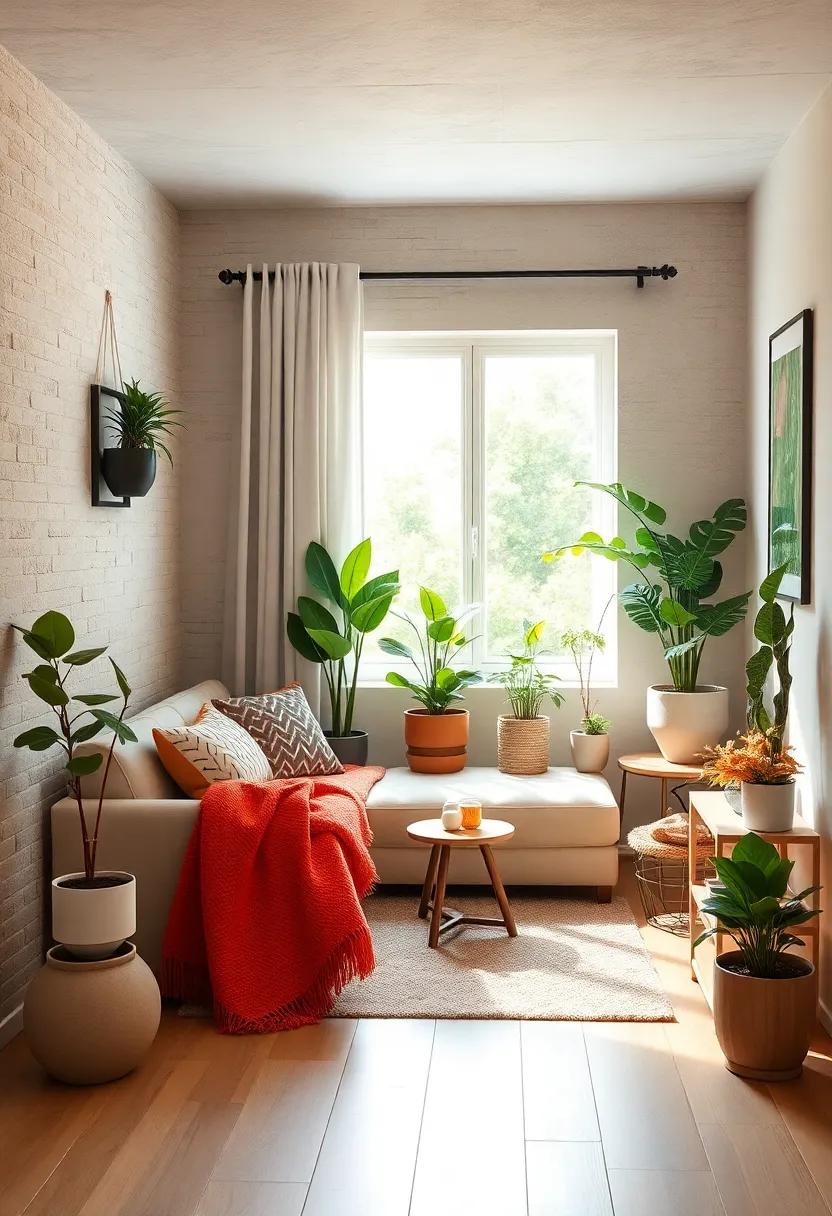
Creating a cozy nook for your indoor plants can wholly transform the ambiance of your teen room. Start by choosing a corner that receives ample natural light, where plants can thrive and create a vibrant atmosphere. Mix and match pots of varying sizes, colors, and textures to showcase your personality. Consider using hanging planters for a whimsical touch or a tiered plant stand to maximize vertical space. You can also incorporate a small side table or shelf that allows for easy access to your plant care essentials.
Opt for easy-to-care-for plants like pothos, snake plants, or succulents if you’re new to indoor gardening. Not only do they add a pop of color,but they also improve air quality,making your sanctuary even more inviting. Complement your greenery with decorative stones or fairy lights for added charm, creating a magical, serene space for relaxation or studying.
| Plant Type | Care Level | Light Requirements |
|---|---|---|
| Snake Plant | Low | Low to Bright Indirect |
| Pothos | Easy | Low to Bright Indirect |
| Succulents | Moderate | Bright Direct |
Decorative Storage Boxes: Cover plain boxes with pretty paper or fabric to create stylish storage options that double as décor
Transform your plain storage boxes into eye-catching décor pieces that enhance your teen’s room while keeping it organized. Start by selecting some basic cardboard or wooden boxes, which can easily be found at craft stores or even repurposed from online orders. Wrap these boxes in beautiful paper or fabric that matches your room’s color scheme or personal style. Consider using patterns that reflect your interests—whether it’s floral, geometric, or even themed fabrics—turning simple storage into a statement.
Once you’ve covered the boxes, take it a step further by adding embellishments. Ribbons,washi tape,or even hand-painted designs can create a unique touch. Don’t shy away from mixing different textures and patterns; contrasting fabrics can create a fun,eclectic vibe. Arranging your newly decorated boxes on shelves or desks not only adds to the overall aesthetic but also provides a stylish solution for stashing away items like books, craft supplies, or personal treasures, making your space both functional and fabulous.
Schedule chalkboard wall: paint a wall with chalkboard paint to create a functional and fun calendar or planner that keeps you organized
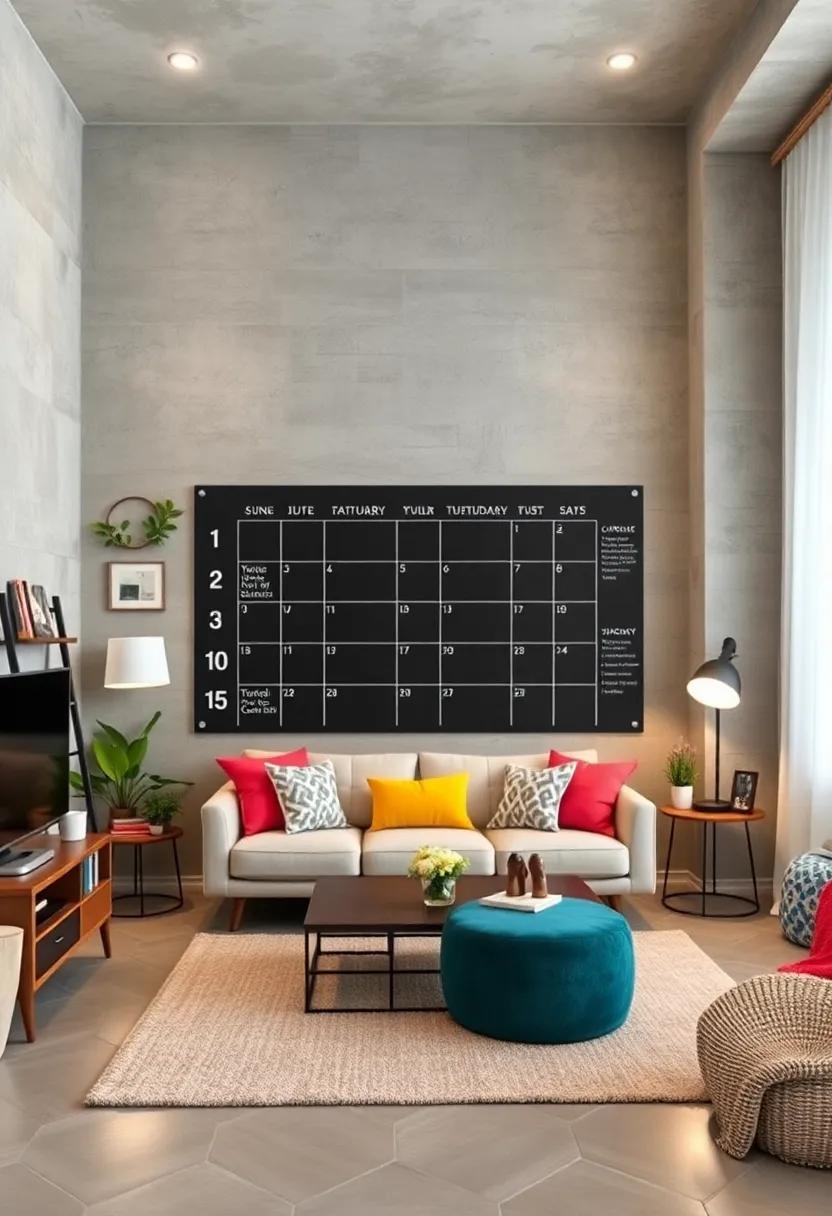
Transform one of your walls into a chalkboard calendar to not only add a unique design element but also to keep things organized in your teen sanctuary.Choose a wall that’s easily visible, and after applying a couple of coats of chalkboard paint, you can turn it into a canvas for creative time management. Use bright chalk markers or conventional chalk to write down your schedule,reminders,and important dates.With a few quick strokes, you can change your plans or add new activities, making it a dynamic part of your room.
To enhance the functionality, consider incorporating design elements around your chalkboard wall. You can add small clipboards or frames next to it to hold important notes and papers, or include shelves to store your favorite chalks and erasers. If you prefer, create a simple grid layout to divide weeks and days, helping you visualize your plans at a glance. Here’s a quick overview of what your chalkboard wall can feature:
| Feature | Description |
|---|---|
| weekly Calendar | Dedicated sections for each day to write tasks. |
| Reminder Notes | Space for fun quotes or important reminders. |
| monthly Overview | A larger section for events and deadlines. |
| Art Corner | A space to doodle or express creativity. |
Fabric Wall Hangings: Sew or glue fabric panels for a soft, chic touch that adds warmth and texture to your room

Transform your teen’s room with the cozy charm of fabric wall hangings. Whether you choose to sew or glue fabric panels, these creative pieces can effortlessly elevate the space by softening harsh lines and adding a splash of color. Consider selecting fabrics in various textures and patterns to create a unique tapestry. This can include anything from boho-inspired prints to minimalistic solids that complement the room’s palette. Assembling these wall hangings is a breeze—cut the fabric to your desired size and either sew stylish hems or simply use fabric glue for a no-sew approach.
Once you’ve crafted your fabric panels, the way you hang them can further enhance their appeal. Options include simple dowel rods for a streamlined look or even a more whimsical approach using wooden dowels and twine that can bring a bit of bohemian flair. You can create a stunning visual impact by layering different panels or arranging them in a grid pattern. For those looking to add extra dimension, consider incorporating elements like fringe or even pom-poms. Not only will these wall hangings add warmth and texture, but they also create an inviting atmosphere where creativity can flourish.
DIY Rug: Create your own area rug using fabric scraps or stencils on a plain rug to tie your room’s color scheme together
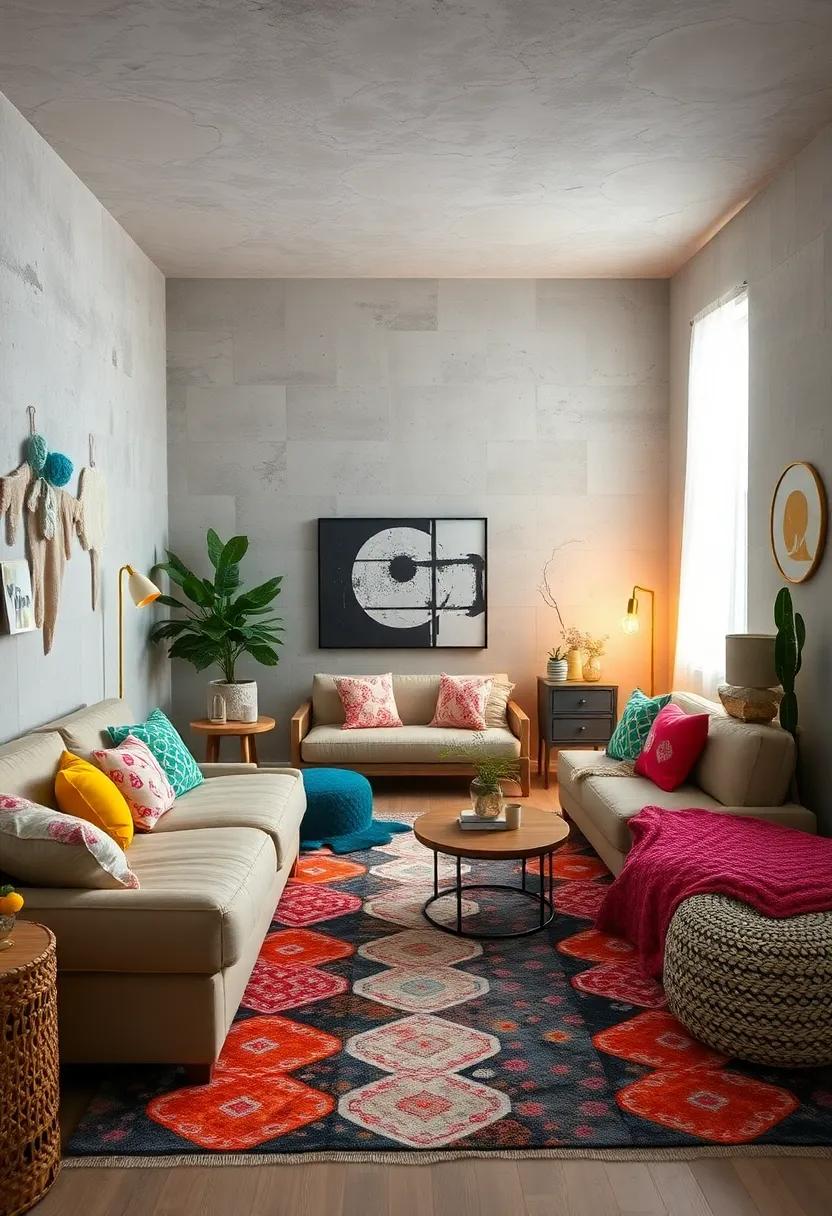
Transforming the flooring of your teen room can be as simple as creating a personalized area rug that showcases your unique style. Gather an assortment of fabric scraps in colors and patterns that reflect your room’s theme. Whether you prefer a bohemian vibe or a minimalist look, the choice of fabrics—from vibrant cotton prints to soft fleece—can make a important impact. Start by cutting the fabrics into various shapes,like triangles,circles,or even fun animal silhouettes,and then sew or glue them onto a canvas backing. This process not only revives old fabric but also allows you to interweave your favorite colors and textures into a cohesive design.
Alternatively, if you have a plain, solid-colored rug that needs a touch of personality, use stencils to create a stunning effect. Choose geometric shapes, floral designs, or abstract patterns, and gather your supplies: fabric paint, a paintbrush, and a sponge. Apply the stencils with careful precision, layering colors that complement your existing decor to achieve an eye-catching focal point.Don’t shy away from experimenting with ombré effects or metallic finishes for added flair. This DIY project is an excellent way to express creativity and ensure that your rug ties all the elements of your stylish sanctuary together beautifully.
Reimagined closet: Use peel-and-stick wallpaper or paint to revamp the inside of your closet, turning it into a stylish hidden space
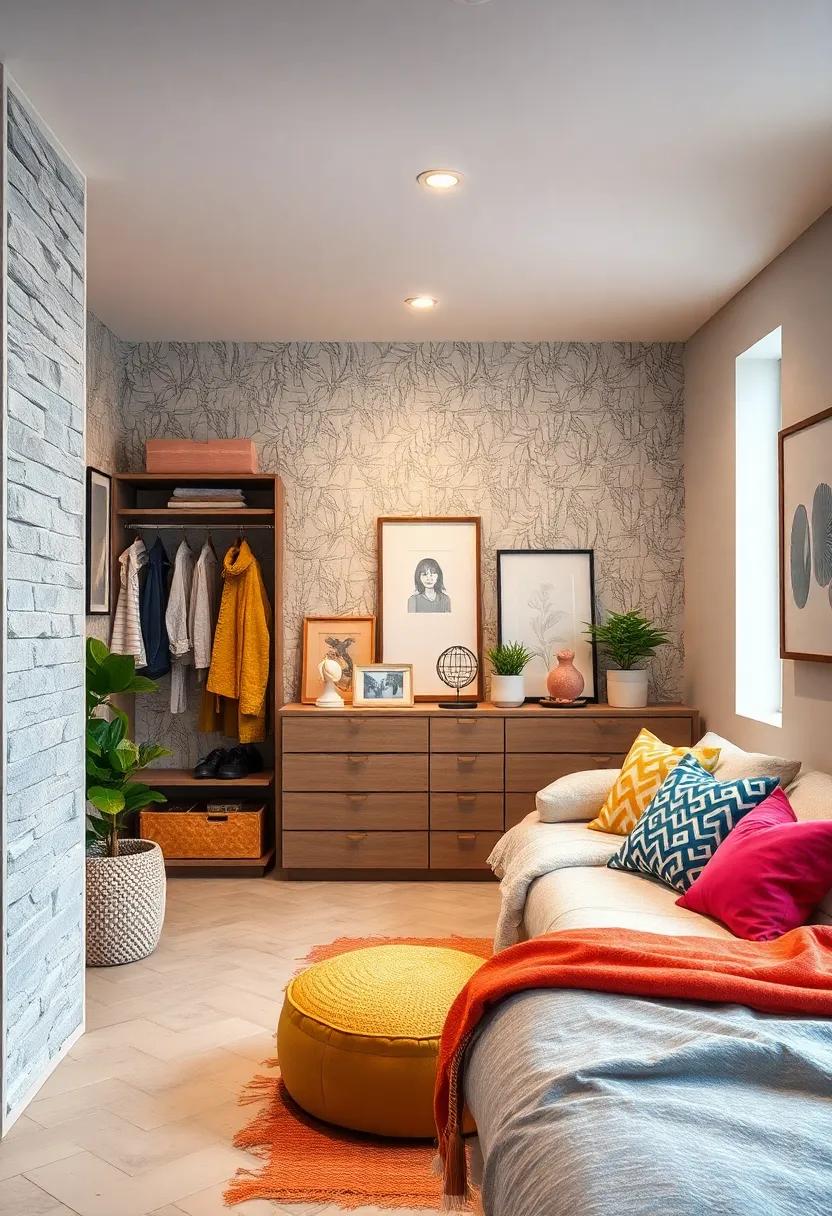
Transform your closet into a chic hideaway with the magic of peel-and-stick wallpaper or a fresh coat of vibrant paint. This hidden space can become a lovely retreat where you can express your personality while organizing your essentials. Select patterns or colors that resonate with your unique style—be it bold florals, whimsical geometric designs, or soothing pastels. This DIY project is not only affordable, but also provides an instant upgrade, making your closet a delightful surprise when you open the doors.
As you embark on this creative adventure, consider the following elements to enhance your revamped closet:
- Lighting: Add string lights or a sleek LED strip to illuminate your closet and give it a cozy ambiance.
- Creative Organizers: Use decorative boxes or colorful bins that complement your new wallpaper or paint to keep everything tidy.
- Accent Features: Incorporate a statement mirror or a small piece of art to complete the look and make the space feel more inviting.
Funky Room Divider: Use curtains or folding screens to separate spaces within a larger room, adding both privacy and style
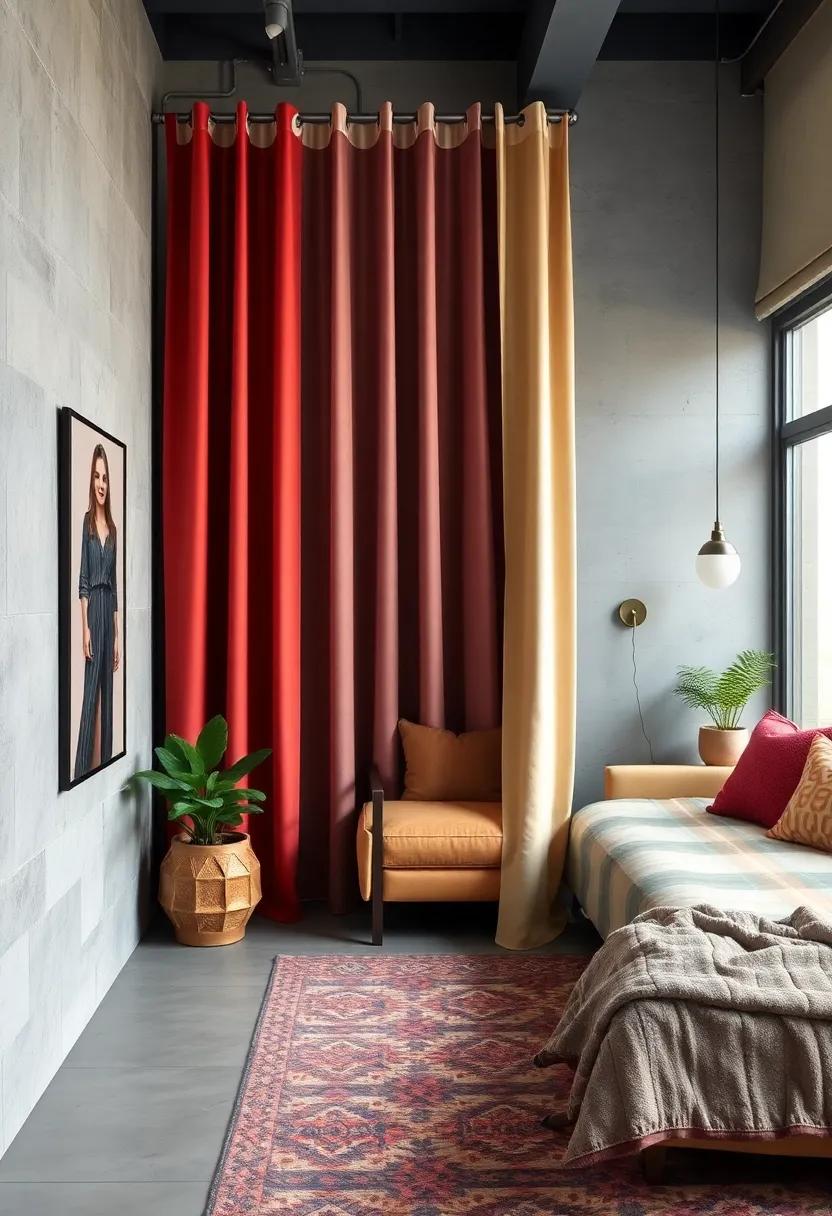
Transforming a larger space into more intimate areas can be a breeze with the right room dividers. Curtains provide a soft,cozy feel while allowing for dynamic changes. They can be hung from a tension rod or a curtain track, making it easy to open or close them based on your mood or needs. Folding screens are another trendy option that can add artistic flair. Available in various designs—from bohemian prints to modern geometric shapes—these screens don’t just serve as dividers; they act as statement pieces that can enhance the overall aesthetic of your teen room.
Consider using a combination of textures to elevate your space. Add sheer fabrics for the curtains to filter light gracefully or go bold with heavily patterned textiles for a dramatic effect. If you’re leaning towards folding screens, try incorporating materials like wood, metal, or bamboo for an eco-chic vibe. you can even customize your divider! Personalize it with stickers,paintings,or a favorite photo montage to make it a true representation of your style. A thoughtfully placed divider can not only separate spaces but also create diverse zones for study, relaxation, or creativity!
Upcycled Pallet Furniture: Make unique shelves or tables from wooden pallets for a rustic industrial vibe
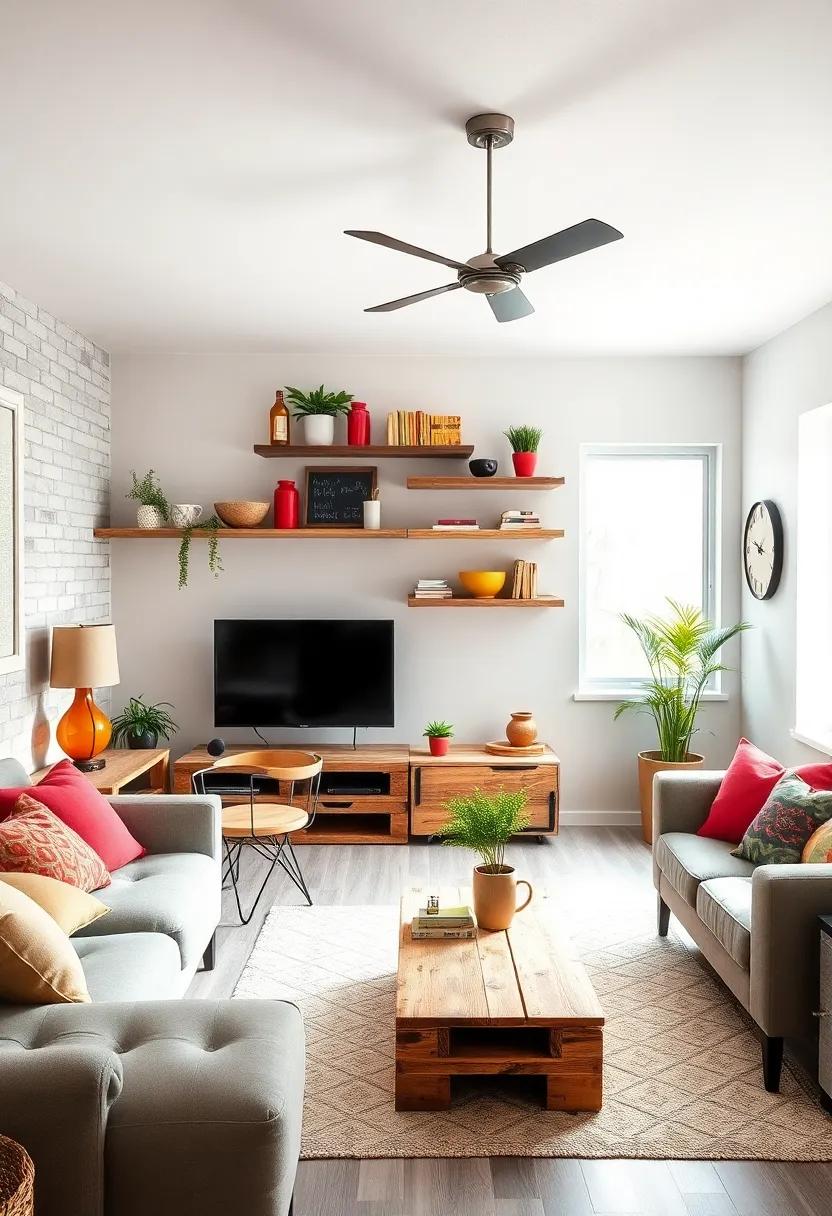
Transforming wooden pallets into stylish shelves or tables can infuse a rustic, industrial vibe into your teen’s room while promoting sustainability. Pallet shelves can be a perfect way to display books, plants, or decorative items without taking up much space. Simply sand down the pallets to ensure a smooth finish, then paint or stain them in a color that complements the room’s decor. mount them on the walls or stack them creatively on the floor to create intriguing visual interest. For a unique touch,consider adding hooks beneath the shelves for hanging lightweight items like headphones or bags,melding style with functionality.
If you’re looking for a more substantial piece, crafting a pallet coffee table is a great way to make a statement.By using multiple pallets stacked together and securing them, you can create a sturdy base.Add wheels for mobility and an extra charm! Alternatively, you can use a glass top to give it a modern twist, blending rustic wood with sleek surfaces. Finish it off with a coat of varnish or paint to match other furniture pieces. This DIY project not only provides a practical surface for snacks or games but also becomes a conversation starter that showcases your creativity.
letter Board Wall: Create a fun letter board where you can change the messages and quotes to reflect your mood or interests
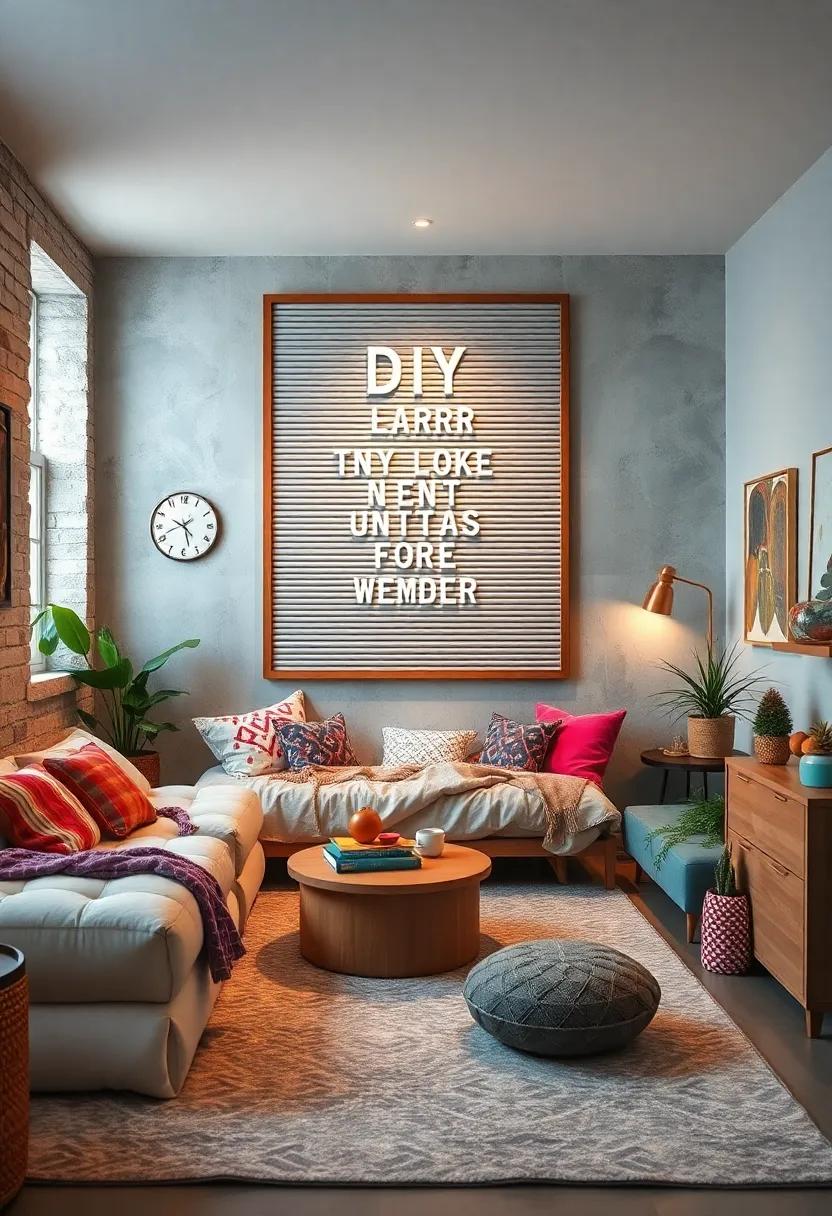
Transform your wall into a versatile canvas with a letter board that allows you to express yourself daily. This interactive decor not only adds personality to your teen room but also serves as a powerful tool for self-expression, enabling you to change messages as your mood or interests shift. From motivational quotes to whimsical phrases or song lyrics, a letter board can become a reflection of your evolving thoughts and feelings. Imagine coming home to an inspiring quote that resonates with your day or a humorous line that brings a smile to your face.
To create a stunning letter board wall, consider the following ideas:
- theme the Quotes: Choose weekly themes such as self-love, adventure, or friendship to keep the content fresh and engaging.
- Colorful Letters: Mix and match different colors of letters to reflect your current mood or season, adding a pop of vibrancy to your space.
- Seasonal Decor: switch up the quotes and decor elements according to holidays or seasons—like spooky phrases for Halloween or cozy remarks for winter.
- Personalize It: Include inside jokes or messages from friends to create a sense of community and connection in your space.
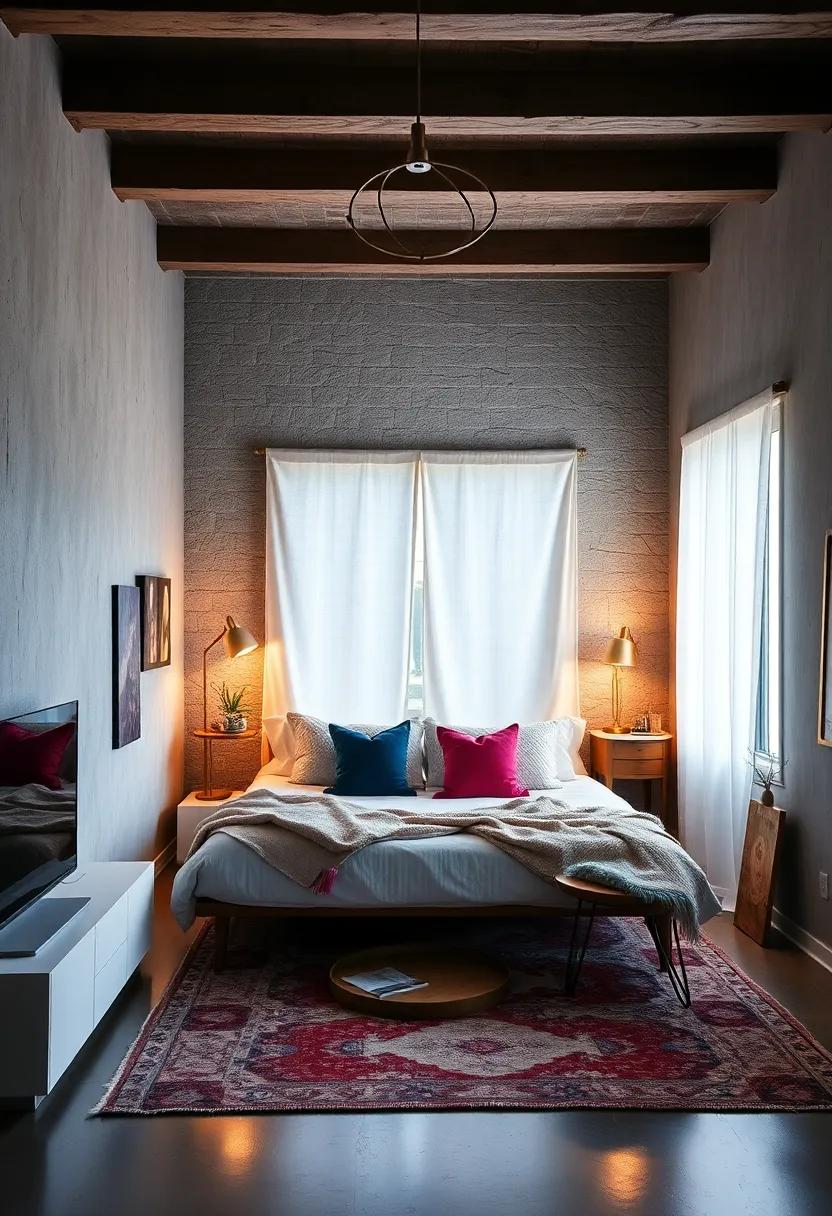
Cozy Reading Nook: Set up a corner with cushions, a blanket, and a good lamp to create a perfect retreat for reading

Transforming a dull corner into a cozy reading nook can be a game changer for any teen room. Start by selecting a few plush cushions in colors that reflect your personality, ranging from soft pastels to vibrant hues. Layer them for added comfort and texture. Throw in a warm, inviting blanket—perhaps a chunky knit or a fleece throw—to wrap yourself up in as you dive into a good book. Don’t forget to include a lamp that not only provides ample lighting but also serves as a stylish statement piece.Whether you opt for a vintage lamp with a charming shade or a modern floor lamp with sleek lines, the right lighting will set the mood for those long reading sessions.
To elevate the ambiance even further, consider adding some personal touches that invite inspiration and relaxation. Incorporate elements like a small bookshelf or a floating shelf to showcase your favorite reads,accompanied by small decor items like succulents or framed quotes that resonate with you. Organize your space with decorative storage boxes to house your reading accessories—like bookmarks and notebooks—keeping everything tidy yet accessible. For those extra cozy vibes, throw in some fairy lights or a string of warm LEDs around the nook to create a magical atmosphere that beckons you to retreat and read.
DIY Wall shelves from Crates: Stack or mount wooden crates on the wall for an easy-going, stylish solution to display your items
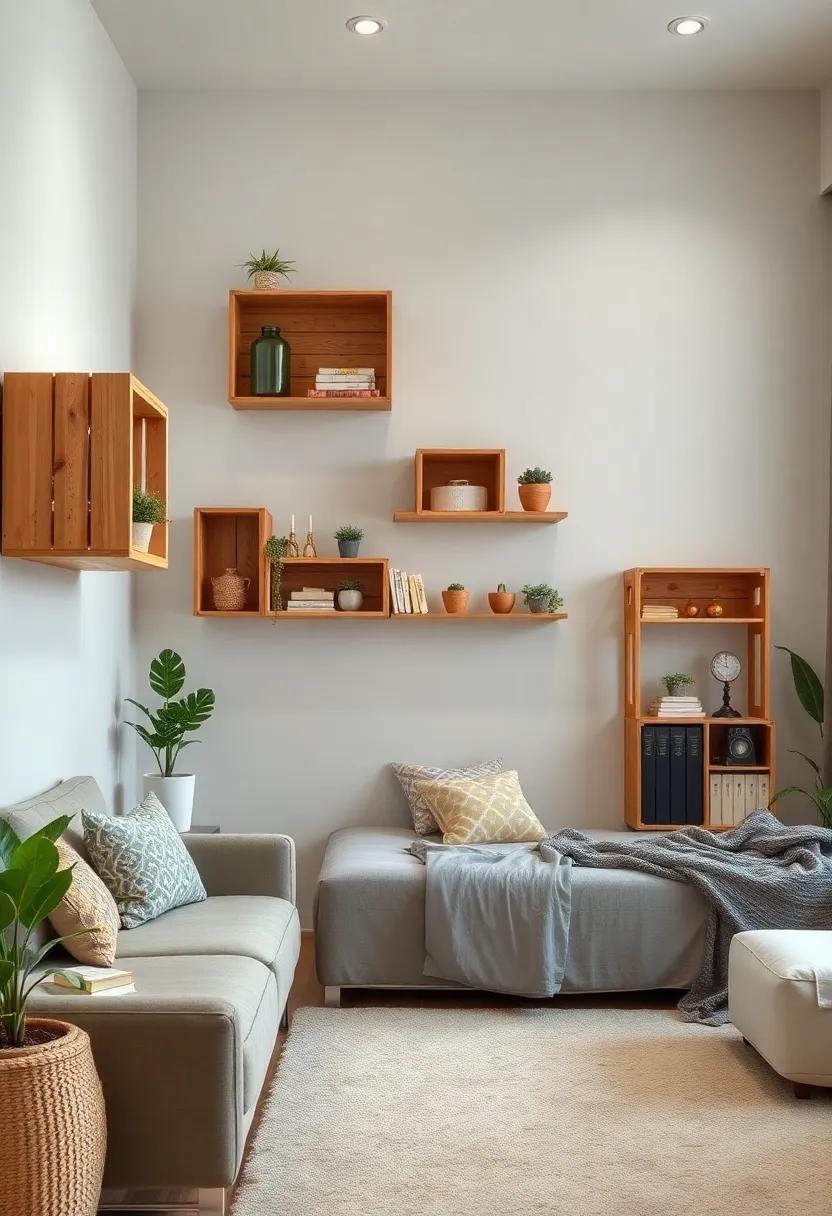
If you’re looking to infuse a bit of creativity and character into your room, utilizing wooden crates as wall shelves offers a unique and functional approach. With a few simple tools and some imagination, you can transform plain crates into stylish storage solutions that reflect your personal style. Stack them vertically for an eye-catching display or mount them in a staggered arrangement for a playful yet organized look. whether you choose to leave the crates in their natural state for a rustic vibe or paint them in your favorite colors, the possibilities are as limitless as your creativity.
To make the most of your DIY shelves, consider styling them with a variety of items that showcase your personality:
- Books: Stack your favorite reads or display them horizontally for a trendy touch.
- Plants: Add a touch of greenery with small potted plants or hanging succulents.
- Art: Showcase your favorite artwork or photos in attractive frames.
- Collectibles: Use the space to feature unique finds from your travels or cherished souvenirs.
- Decorative objects: Incorporate quirky trinkets that spark joy and conversation.
| Style Option | Description |
|---|---|
| Natural Wood | Keep the crates unpainted for a rustic look. |
| Color-Pop | Paint crates in vibrant colors for a fun effect. |
| Patterned | Use stencils to create unique patterns on your crates. |
| Layered | Mix and match sizes for a more dynamic arrangement. |
Don’t forget to secure the crates properly to the wall to ensure stability. Utilizing wooden crates not only provides practical storage but also serves as a canvas for your creativity, making your teen room a true sanctuary of style and expression.
Artsy Dividers: Use large canvas or paper screens to create a transitional space in your room, perfect for dual-purpose area setups
Transforming your room into a stylish sanctuary can be achieved with the clever use of large canvases or paper screens. These artsy dividers not only serve a functional purpose but also act as stunning focal points that reflect your personality. Whether you prefer bold colors, intricate patterns, or serene pastels, the right divider can seamlessly define different areas within your space. Consider creating a cozy study nook separated from your relaxation zone, allowing for better focus without sacrificing style. You can also personalize these dividers with paint, fabric, or even string lights to enhance the atmosphere.
To ensure your dividers enhance the flow of your room, think about the materials you use and the design elements that resonate with you. Here are some creative ways to utilize these screens:
- Interactive Art: Incorporate a chalkboard or a whiteboard section into your screen for spontaneous creativity.
- Gallery Display: Clip favorite photos or art pieces along the divider, creating a dynamic visual experience.
- Nature-Inspired: Include small planters on top to add a touch of greenery, bringing life to your space.
- Functional Storage: Use shelves attached to the divider for books or decorative items,maximizing utility without compromising style.
Talented Towel and Blanket Hanger: Create a functional wall-mounted holder for your favorite throws and towels that’s both practical and stylish
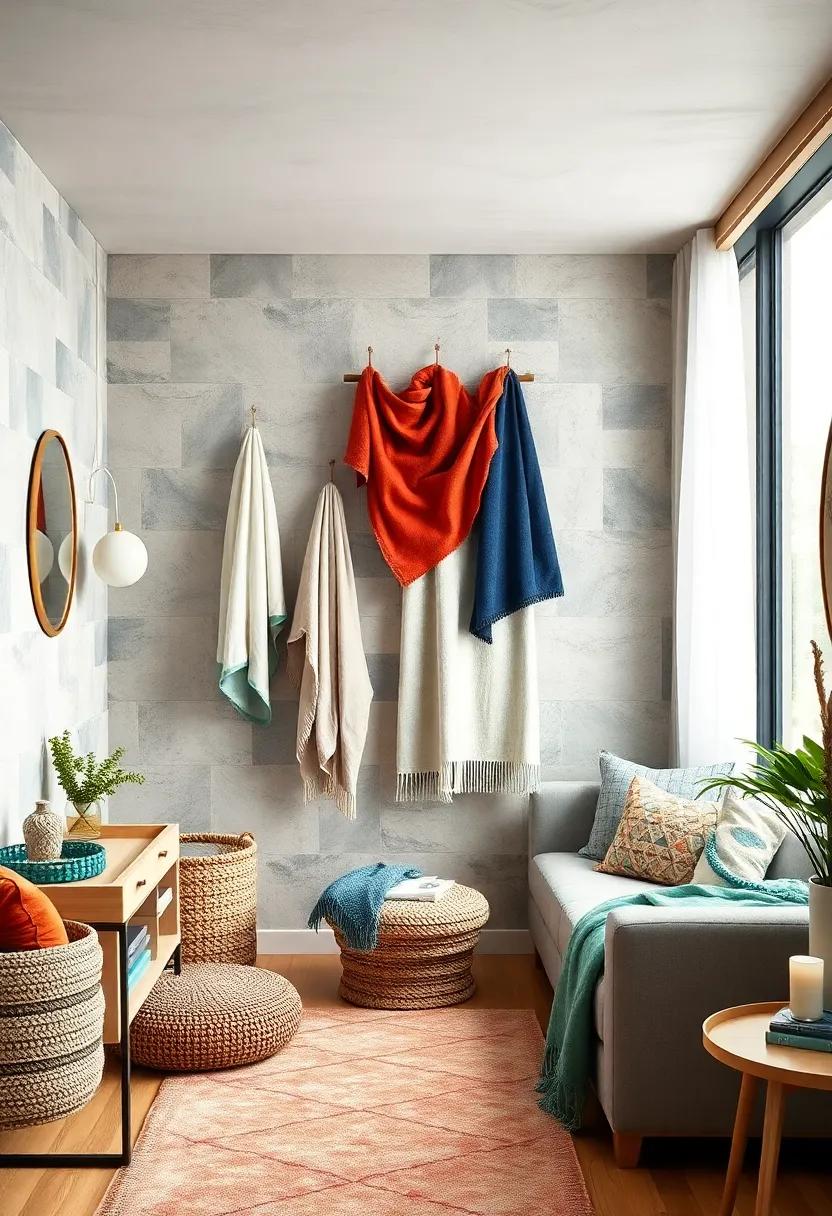
Create a charming and practical space for your teen’s throws and towels with a stylish wall-mounted holder. This DIY project not only maximizes your room’s functionality, but also adds a touch of flair to the decor. Start by selecting materials that complement your room design, such as reclaimed wood for a rustic vibe or sleek metal for a modern feel. Consider the following supplies:
- Wood or metal rods
- Brackets or hooks
- Paint or stain (optional)
- Measuring tape
- Drill or screwdriver
Once you have your materials, measure and mark where you want the holder to be, ensuring it’s at a agreeable height for easy access. Attach the brackets to the wall and fit the rods or hooks securely into place. for an eye-catching touch,add decorative knobs or paint accents that reflect your teen’s personality. Here are a few design ideas:
- Colorful crochet hooks for a bohemian look
- Rustic wooden shelves with jute twine
- Industrial-style metal fixtures for an urban vibe
Personalized Light Switch Covers: Upgrade your light switch covers with paint or decorative designs to incorporate your style into the smallest details
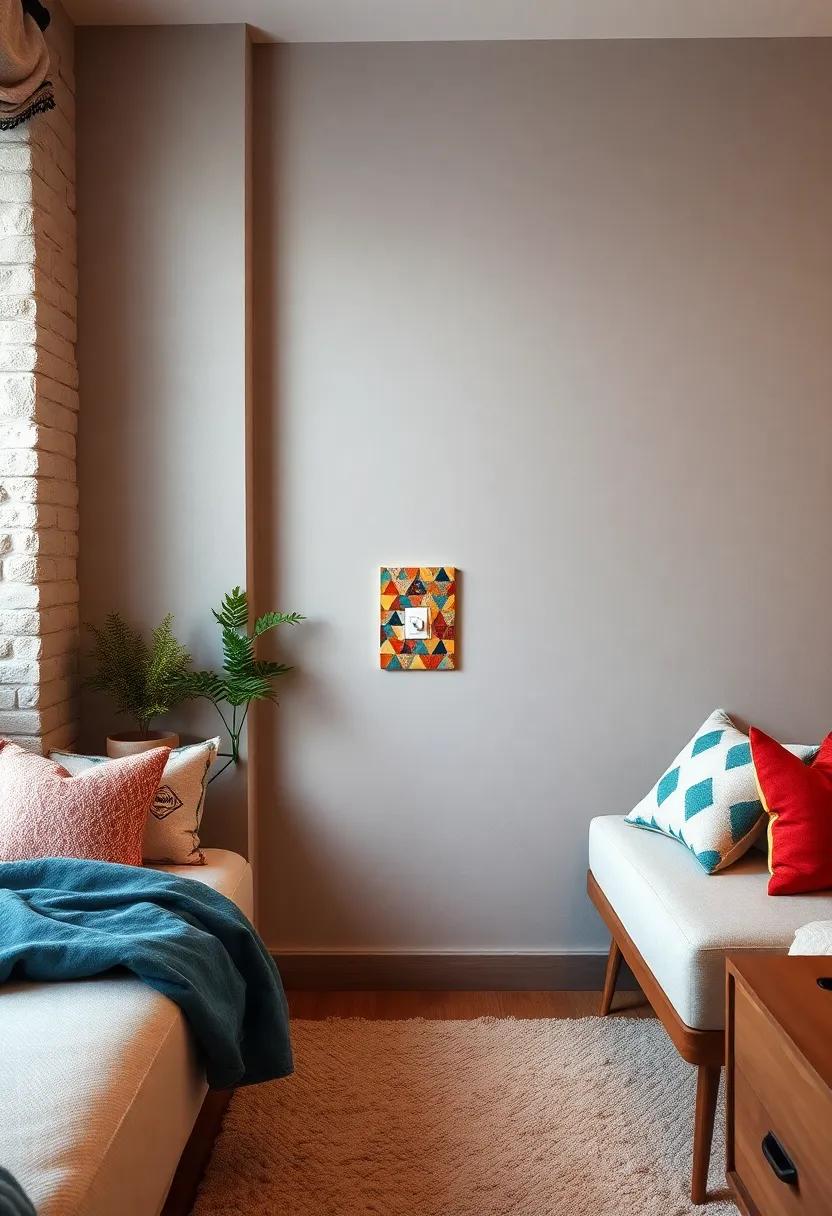
Transforming a standard light switch cover into a personalized piece of art is a simple yet effective way to infuse your personality into your teen room. Consider using spray paint in your favorite color, or unleash your inner artist with acrylics for a hand-painted design that reflects your style. You can also apply washi tape in vibrant patterns or colors for a modern touch without committing to permanent changes. This approach allows you to easily switch out designs as trends and moods evolve, ensuring your room always feels fresh and inviting.
If you’re looking for inspiration to get started, here are some inventive design ideas that can be easily achieved with minimal materials:
- Quotes and Sayings: Paint inspiring quotes or fun phrases that resonate with you.
- Photo Collages: Use decoupage techniques to stick your favorite photos.
- Nature Themes: Create covers with floral, leaf patterns or even serene landscapes.
- Favorite Hobbies: Incorporate doodles or designs inspired by your favorite activities, be it music, sports, or art.
To help visualize your ideas,consider laying out a simple plan for how you might create your designs. Here’s a quick reference table:
| Design Idea | Materials Needed | Time Required |
|---|---|---|
| Washi Tape Pattern | Washi tape, scissors | 30 minutes |
| Hand-Painted Art | Acrylic paint, brushes | 1-2 hours |
| Photo Decoupage | Photos, decoupage glue | 1 hour |
| Quote Calligraphy | Paint marker, stencil (optional) | 30 minutes |
In Retrospect
As we wrap up our exploration of these 27 creative DIY ideas, we hope you feel inspired and ready to embark on a journey of change within your teen sanctuary. Remember, this space is more than just a room; it’s a canvas for your imagination, a reflection of your personality, and a turning page in the story of who you are becoming. Whether you opt for a bold mural, clever storage solutions, or cozy reading nooks, the key is to create an environment where you feel comfortable and at peace. So gather your supplies, invite some friends to lend a hand, and let your creativity flow! After all, the best part of a DIY project is not just the end result, but the joy of making it your own. Happy crafting!